CONTENTS
DEMO
PARTS
For the smart guitar pedal project, I used:
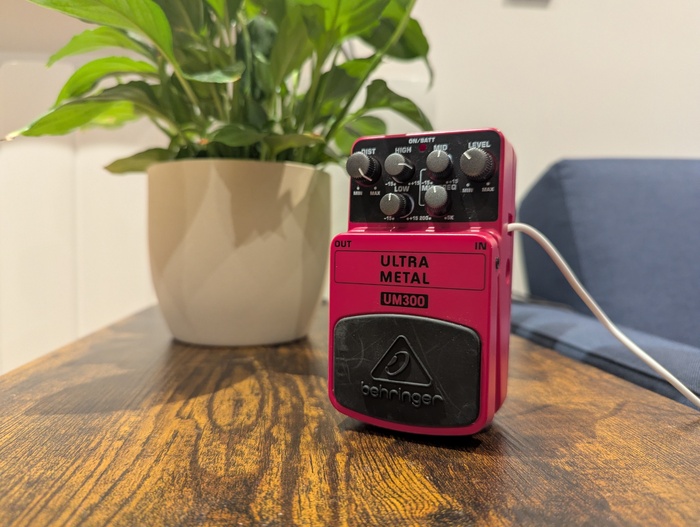
- A Behringer Electric Guitar Pedal
- An ESP32
I tested the pedal with my Smart Mirror LED strip (connected to Home Assistant).
ELECTRONICS
My old guitar pedal suddenly stopped working, but I didn’t want to throw it away because it looks so darn cool (and it’s the first pedal I ever bought). I realised it would make a pretty neat smart switch with all its dials and stomp button, so I decided to mod it with an ESP32 to use as a Home Assistant sensor.
Let’s open it up and see what’s inside!
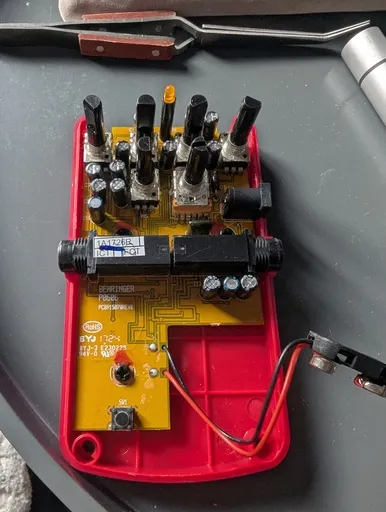
I don’t know much about pedal circuitry, but supposedly there’s an operational amplifier in there which boosts the signal, and some diodes which clip it when it gets too big. This results in a square wave, giving us our beloved distorted sound. The many capacitors work to remove noise and electrical hum from the signal.
There are potentiometers along the top which control how much of the signal is routed through the diode (and do some other clever stuff with filter circuits to change the tone). The ‘stomp’ button is actually just a tactile switch on the bottom-left, which is pushed by a plastic dowel. These are the parts I’ll want to use to control my smart devices.
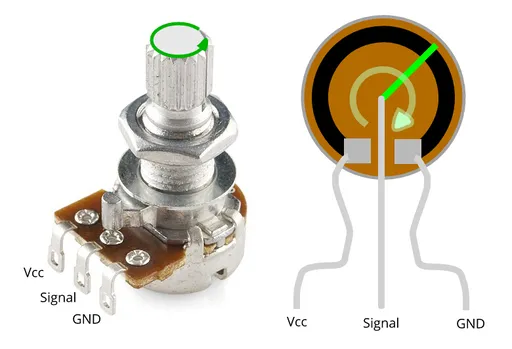
A potentiometer (which I’ll sometimes refer to as a ‘pot’ because that’s far too many letters) is a variable resistor, and turning the knob will change how much of the resistor your current flows through. You connect voltage to one outer pin and ground to the other. The middle pin (wiper) gives us our signal (the varied voltage).
I tried to salvage the potentiometers and the button from the pedal, but as I found out the hard way, I’m not very good at desoldering components from a PCB…
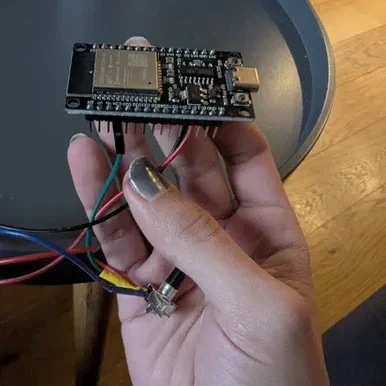
I did manage to get a pot out and hooked it up to my ESP32 to see if it was still working. I used pin 34 for the signal.
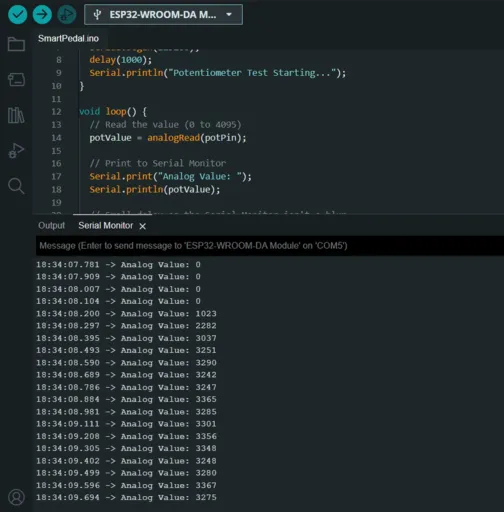
I uploaded this test script to the board using the Arduino IDE:
// Smart Guitar Pedal Potentiometer Test
// We use GPIO 34 because it is an Input-Only Analog pin
const int potPin = 34;
int potValue = 0;

void setup() {
  // ESP32 serial communication is usually faster than Arduino
  Serial.begin(115200);
  delay(1000);
  Serial.println("Potentiometer Test Starting...");
}

void loop() {
  // Read the value (0 to 4095)
  potValue = analogRead(potPin);

  // Print to Serial Monitor
  Serial.print("Analog Value: ");
  Serial.println(potValue);

  // Small delay so the Serial Monitor isn't a blur
  delay(100);
}
With bated breath, I turned the potentiometer. Sure enough, the value on the readout changed – I didn’t destroy this one!
CONNECTING TO HOME ASSISTANT
We won’t need to write scripts and compile/upload them directly to the board for the smart guitar pedal.
Instead, we will use ESP Home. The instructions on their website are pretty good; I connected the ESP32 to my PC and installed a basic configuration to get started.
You can then edit the configuration through their web UI to add your sensors. Here is my config for the pot and the tactile switch (which I wired between pin 32 and ground).
sensor:
  - platform: adc
    pin: GPIO34
    name: "Potentiometer 1"
    update_interval: 0.05s
    # Attenuation 12db allows reading from 0V to 3.9V (full 3.3V range)
    attenuation: 12db
    unit_of_measurement: "%"
    filters:
      # Smoothes out the 'jitter' so the value doesn't jump randomly
      - sliding_window_moving_average:
          window_size: 10
          send_every: 1
      - calibrate_linear:  # Map your voltage to percent
          - 0.13 -> 100.0
          - 3.1 -> 0.0
      - clamp:
          min_value: 0.0
          max_value: 100.0
      # Only send to Home Assistant if it changes by more than ...
      - delta: 1

binary_sensor:
  - platform: gpio
    pin:
      number: GPIO32  # Connect your smart guitar pedal foot switch to this pin and GND
      mode:
        input: true
        pullup: true
      inverted: true
    name: "Pedal Foot Switch"
    on_press:
      # Optional: Make it do something immediately within the ESP32
      then:
        - logger.log: "Pedal Pressed!"
The ESP32 will pick up voltage noise, even if you aren’t turning the pot. The sliding window and the delta help smooth this out so you don’t get spammed with sensor updates in Home Assistant. I mapped the voltage to a value between 0 and 100 (to indicate a percentage) and clamped it to prevent outliers. You might need to adjust these values until you get readings you’re happy with.
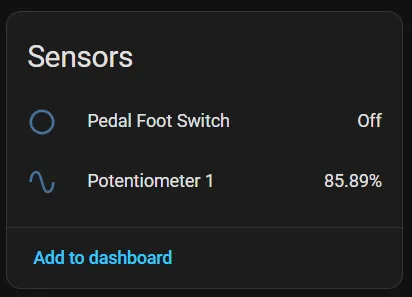
If all goes well, you’ll see your new smart guitar pedal device and its sensors in Home Assistant!
You can use that in whatever automation you wish. Here’s an example of how I used the pot to dim my lights (you’ll want to set your entity_id to one of your devices):
alias: Smart Guitar Pedal Pot 1
description: ""
triggers:
  - trigger: state
    entity_id:
      - sensor.guitarpedal_potentiometer_1
conditions: []
actions:
  - action: light.turn_on
    metadata: {}
    target:
      entity_id: light.test_light
    data:
      brightness_pct: "{{ states('sensor.guitarpedal_potentiometer_1') | float }}"
mode: restart
The data is the pot value cast to a float (you may need to edit the YAML directly for that). The mode: restart flag at the end reduces the delay if this is triggered multiple times successively (for example, if you turn the pot quickly).
Now that we’ve set up the sensors and the code, it’s time to cram this back into the case and see it working!
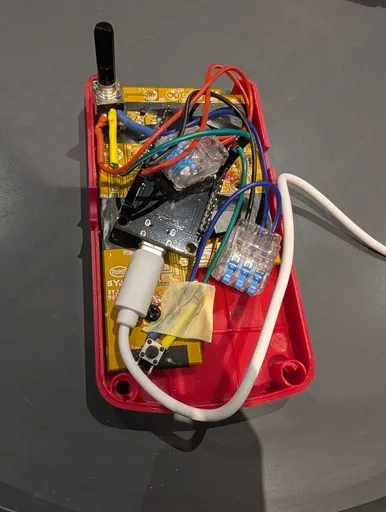
Listen. I know it’s a mess. To test it out, I just used some lever connectors to join the wires up (they can be soldered later once we see it working). We have to make sure the tactile button is in the same place so the plastic rod connects with it when we stomp on our new smart guitar pedal.

We’ll pop the rest of the case on to hide that wiring nightmare, and we’re ready to go!
I’ve currently got it controlling my smart mirror lights, but once I wire up the rest of the pots, I think I’ll put it under my desk as a foot switch. Maybe to control the lights or my charger!